


House Clearance: How to Prepare Before the Professionals Arrive is one of those phrases that tends to surface when life is shifting, cupboards are overflowing, or a long-postponed clear-out has finally reached the top of the to-do list. It hints at fresh starts, reclaimed space, and the quiet satisfaction that comes from knowing things are about to become far more manageable than they were yesterday.

Whether you’re dealing with a full property clearance, helping a relative downsize, or simply tackling years of accumulated “useful items”, preparing properly before the professionals arrive can save time, money, and a surprising amount of stress.
In the UK, demand for house clearance services UK has grown steadily as households look for efficient, compliant ways to remove unwanted items. But the smoother your preparation, the better value and results you’ll get from the service.
Below is a practical, step-by-step guide to help you get ready.
Why Preparation Matters More Than You Think?
It’s tempting to assume the clearance team will simply arrive, wave a magic van around, and everything will disappear neatly. While professional teams are impressively efficient, a little groundwork on your part makes a significant difference.
Good preparation helps you:
- Reduce overall clearance costs
- Protect important or sentimental items
- Speed up the job on the day
- Ensure legal disposal of restricted materials
- Maximise donations and recycling
In short, a bit of planning now prevents that frantic “Wait — don’t take that!” moment later.
Step 1: Start With a Clear Plan
Before opening a single cupboard, decide what level of clearance you actually need. Not every situation requires a full empty-house service.
Ask yourself:
- Is this a full property clearance or partial?
- Are you preparing for a house move, sale, or renovation?
- Is there a deadline (e.g. tenancy end)?
- Will you be present on the day?
Having clarity helps when booking house clearance services UK, as providers usually quote based on volume, access, and type of waste.
Pro tip: Take photos of rooms before you start. It helps you track progress, and proves just how much you’ve achieved.
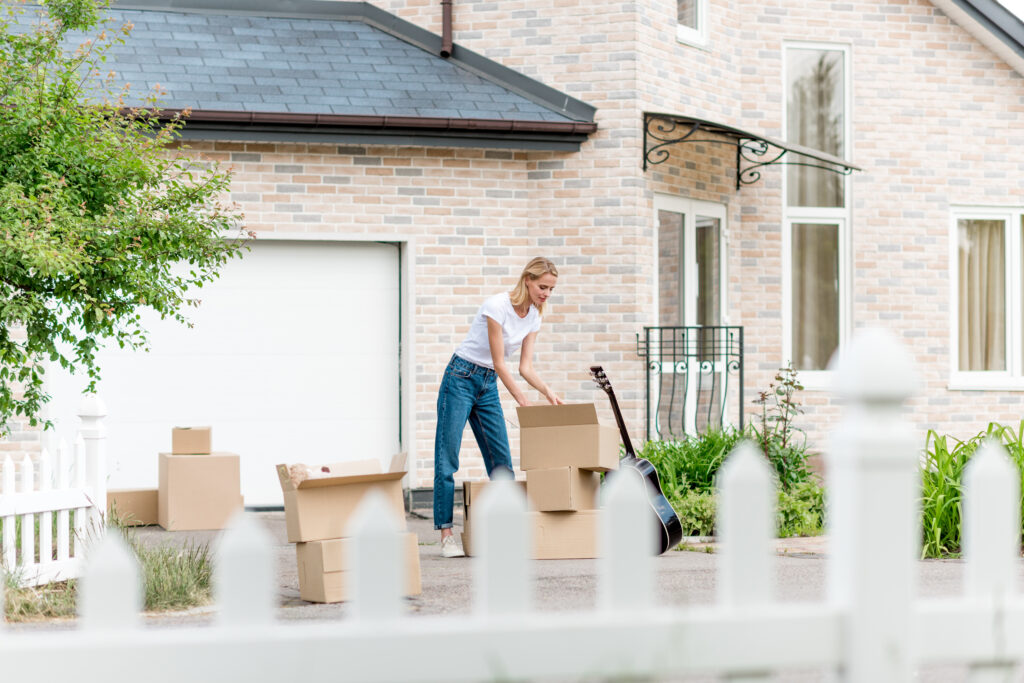
Step 2: Sort Before the Professionals Arrive
Sorting is the single most valuable thing you can do ahead of a house clearance. Professionals charge primarily by volume, so every item you remove beforehand saves money.
Use the classic four-pile method:
✔ Keep
Items you definitely want to retain.
✔ Donate
Usable goods that could help someone else.
✔ Sell
Valuable items worth listing online or through local sales.
✔ Dispose
Broken, unusable, or end-of-life items.
Work room by room rather than jumping about the house, it keeps momentum going and prevents overwhelm.
Step 3: Be Realistic About What’s Worth Keeping
House clearances often stall because everything feels potentially useful. If you haven’t used something in years, chances are it’s quietly waiting for permission to leave.
Ask practical questions:
- Have I used this in the past 12 months?
- Would I buy this again today?
- Is it broken beyond reasonable repair?
- Does it genuinely have sentimental value?
A gentle rule of thumb: memories usually live quite happily without needing the entire object attached.
Step 4: Identify Valuable or Sensitive Items Early
Before the clearance team arrives, set aside anything that could be:
- Financially valuable
- Legally important
- Personally sensitive
This includes:
- Passports and legal documents
- Jewellery and watches
- Cash or old currency
- Family photos
- Hard drives and electronic storage
Place these in a clearly labelled box and keep it somewhere safe. Professional teams are careful, but prevention is always wiser than a panicked search through recycling bags.
Step 5: Explore Donation Options
One of the best parts of a well-managed house clearance is how much can be reused rather than thrown away.
Across the UK, many charities accept good-quality items such as:
- Furniture
- Clothing
- Books
- Kitchenware
- Small appliances (working condition)
Popular UK donation routes include:
- Charity shops
- Furniture reuse networks
- Local community groups
- Homeless support charities
- Refuge centres
Many house clearance services UK providers will also separate donation-worthy items if you request it in advance.
Bonus: donating usable goods can sometimes reduce your overall clearance quote.
Step 6: Understand Hazardous Waste Rules
This is where preparation becomes genuinely essential.
Certain household items cannot legally go in standard clearance loads and must be handled separately under UK waste regulations.
Common hazardous items include:
- Paint and solvents
- Asbestos materials
- Chemicals and pesticides
- Gas bottles
- Medical waste
- Car batteries
- Fluorescent tubes
- Fridges and freezers (contain refrigerants)
If these are present, tell your clearance provider before booking. Reputable companies will either:
- Arrange specialist disposal, or
- Advise you on local council facilities
Never try to hide hazardous waste in general clearance piles, it can lead to refused loads or additional charges.
Step 7: Check Access and Parking
It sounds mundane, but access issues are one of the biggest causes of delays on clearance day.
Make sure to consider:
- Is there nearby parking for a van?
- Are there stairs or lifts involved?
- Are there narrow hallways or tight turns?
- Are permits required for parking?
- Are neighbours affected by access?
If the property is in a flat or controlled parking zone, inform your house clearance services UK provider ahead of time so they can plan properly.
Step 8: Remove Personal Waste You Can Handle Yourself
You don’t need professionals to remove a few bags of everyday rubbish. Clearing obvious general waste beforehand can reduce the job size.
Good candidates for DIY disposal:
- Regular bin waste
- Old paperwork (shredded)
- Empty packaging
- Basic recycling
However, avoid overfilling your household bins beyond council limits, nobody wants a stern note from the local authority as a souvenir.
Step 9: Label What Must Stay
During busy clearances, especially full-house jobs, mistakes can happen if items are not clearly marked.
Use visible labels such as:
- DO NOT REMOVE
- KEEP
- STAY IN PROPERTY
Place them directly on furniture or boxes you want left behind.
This simple step prevents the classic clearance horror story: the accidental removal of the one item you absolutely meant to keep.
Step 10: Defrost and Empty Appliances
If white goods are being removed, prepare them properly beforehand.
Fridge and freezer checklist:
- Defrost at least 24 hours prior
- Empty all contents
- Wipe out excess water
- Leave doors slightly open
This helps the team move items safely and avoids unpleasant leaks (or smells that could clear a room faster than any professional service).
Step 11: Communicate Special Instructions Clearly
Professional clearance teams work quickly. If you have specific requests, share them in advance.
Examples include:
- Items going to charity
- Items requiring careful handling
- Rooms that are off-limits
- Priority removal areas
- Time restrictions
Most house clearance services UK companies are very accommodating, but only if they know your expectations ahead of time.
Step 12: Understand How Pricing Works
House clearance pricing in the UK typically depends on:
- Volume of waste
- Type of materials
- Labour required
- Access difficulty
- Disposal fees
- Location
Preparing well can significantly reduce costs because:
- Less volume = lower fees
- Easier access = faster job
- Proper sorting = less specialist disposal
Always request a written quote where possible, and check whether VAT and disposal charges are included.
Step 13: Consider Timing Carefully
Timing can influence both availability and cost.
Best times to book:
- Mid-week (often quieter)
- Outside peak moving seasons
- With at least 1–2 weeks’ notice
If you’re clearing a property after probate or before a sale, build in a small buffer. Clearance days often run smoothly — but homes have a talent for surprises.
Step 14: Prepare Emotionally
House clearances aren’t always just practical jobs. They can be emotional, particularly when:
- Clearing a family home
- Downsizing after many years
- Handling bereavement situations
Give yourself permission to take breaks while sorting. If needed, ask a friend or relative to help, a second pair of hands often makes decisions easier.
And remember: clearing space doesn’t erase memories. It simply makes room for the next chapter.
Step 15: Do a Final Walk-Through Before They Arrive
On the morning of the clearance, do one last calm walk through the property.
Check for:
- Items left in drawers
- Loft or garage contents
- Garden sheds
- Behind doors
- Under beds
You’d be amazed at what turns up in the final five minutes, usually the thing you were sure you hadn’t misplaced.
What to Expect on Clearance Day?
When you’ve prepared properly, clearance day is usually refreshingly straightforward.
Most professional teams will:
- Confirm the agreed scope
- Protect floors if needed
- Remove items efficiently
- Separate recycling where possible
- Provide waste transfer documentation
A typical standard house clearance can take anywhere from 2 hours to a full day depending on size and access.
Choosing the Right House Clearance Company
Not all providers are equal, so look for:
- Registered waste carrier licence
- Clear pricing
- Positive reviews
- Proof of responsible disposal
- Insurance cover
- Willingness to donate usable goods
Reliable house clearance services UK providers should be transparent about where your items end up, landfill should be the last resort, not the default.
Final Thoughts!
A well-planned house clearance doesn’t have to feel overwhelming, chaotic, or wildly expensive. With sensible sorting, clear communication, and awareness of hazardous waste rules, the process becomes far more manageable and often surprisingly satisfying.
Take the time to prepare properly, donate what you can, and choose reputable house clearance services UK professionals who prioritise responsible disposal. Your future self (and your newly reclaimed space) will thank you for it.
For more practical home advice, gentle guidance, and smart household tips, do remember to follow The Household Daily.


